
May 15, 2024
Let’s draw! Whether you’re a professional artist, hobbyist, student, or occasional doodler, it’s always fun to pick up your pencil! If you’re wondering where to start, we’ve got some tips on pencils (pun very much intended) and basic drawing techniques below. Use all five or concentrate on just one, there’s no wrong way to draw!
Choosing a Pencil
What do you need to start your masterpiece? A pencil of course! While Ticonderoga isn’t known for specialty drawing pencils, we do offer a wide variety of pencils that are great for writing and drawing.
Selecting a pencil for drawing really comes down to choosing the graphite hardness. All pencil cores are composed of a mix of graphite and clay filler. More clay makes a harder core, less clay makes a softer core. So how do you know which one you need?
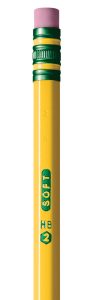 First, let’s tackle identification. All Ticonderoga pencils are labeled with letters:
- H = Hard, light lines
- HB = Medium, darker lines than H
- F = Firm, darker lines than HB, not as dark as B
- B = Soft, darkest lines possible with pencil lead
The number on the side of each Ticonderoga pencil indicates the degree of hardness of the writing core. The higher the number, the harder the core and the lighter the mark.
Harder pencils can maintain a sharp point for longer and create a thinner, lighter line. This makes them ideal for precision drawing and writing. If you want to draw a lot of small details, choose a harder pencil. The hardest Ticonderoga pencil is #4 2H.
Softer pencils produce a darker, wider line, allowing for more blending. If you want to incorporate a lot of shading and softer forms in your drawing, choose a softer pencil. The softest Ticonderoga pencil is #1 B.
And what do you do if you want to do a little of everything? Choose an #2 HB… commonly known as the classic No. 2 pencil!
View Classic Pencils and Select Hardness
Drawing Techniques
Now let’s get into those techniques! There are many out there of course, but here are five basics to get you started.
 |
Blending
Using either linear or circular strokes, shade in an area of your drawing. Then, using either a blending stick or your finger, rub the graphite into the paper. This will smudge the graphite and create a smooth, blended look. A softer pencil is ideal for this technique. |
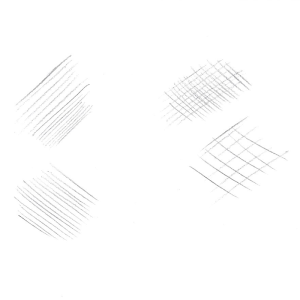 |
Hatching & Cross Hatching
Hatching is drawing a set of parallel lines. The closer you draw the lines, the “darker” the area will appear. Or if they’re more spread out, the area will appear “lighter.” Cross hatching is a similar technique, where you draw one set of parallel lines, then another on top of it at a 90° angle – as if you were drawing many X’s close together. Again, how close you draw these lines will determine how “light” or “dark” the area will appear. Medium or hard pencils work best for these techniques, as they will make it easier to maintain the distinction between lines. |
 |
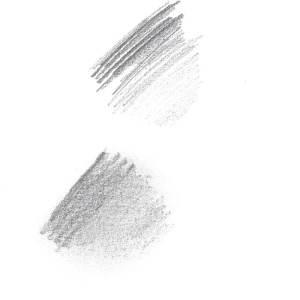
Scumbling
Scumbling is a fun technique where you draw layers of broken lines or looped scribbles on top of each other to create a textured effect. You read that right – scribbling is a real drawing technique! All types of pencils work well for this technique, which one you choose depends on the look you want to achieve. |
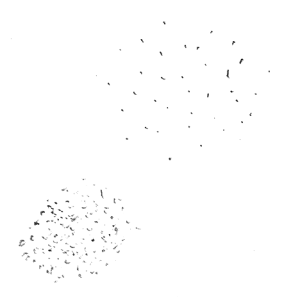 |
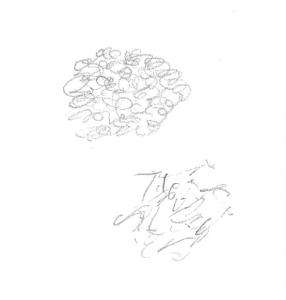
Stippling
Stippling is using nothing but dots to create shape, texture, and shadow. Lots and lots of dots. Much like hatching and cross hatching, the closer (or more concentrated) the dots are, the “darker” an area will look. All types of pencils work well for this technique as well, depending on the look you want to achieve. |
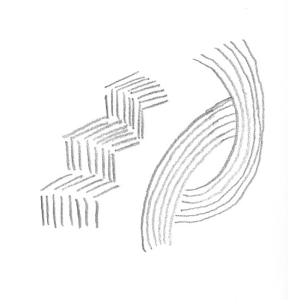 |
Directional The directional technique is similar to hatching in that it uses a series of parallel lines. However, the big difference here is that the lines can bend to create shape, or even a 3D type look. Medium or hard pencils work best for this technique as well, as they will make it easier to maintain the distinction between lines.
|
These five techniques are a great way to play around with and practice your drawing skills. Once you’ve mastered these basics, feel free to explore with more advanced techniques – or even create your own! As long as you’re having fun, there’s no wrong way to draw!
Psst!… Don’t forget your eraser! View All Erasers
And if you’re looking to learn more about the eraser, check out our blog Eraser Facts!